As warm weather approaches, many homeowners look forward to opening their windows and letting fresh air in. However, along with the breeze often comes unwanted visitors like flies, mosquitoes, and other insects. Fly screens, also called insect screens, are a simple yet effective solution to this problem. Installing them might seem intimidating at first, but with the right tools and instructions, it’s a manageable DIY project that can enhance your comfort at home.
Why Install Fly Screens?
Fly screens serve multiple purposes beyond keeping insects out. They allow ventilation, which can improve indoor air quality and reduce reliance on air conditioning. They also act as a safety barrier for small children and pets while enjoying open windows. Modern screens come in various materials and designs, from traditional mesh to more durable, pet-resistant options. Installing them correctly ensures they work effectively and last for years.
Tools and Materials Needed
Before starting, gather all necessary tools and materials. Having everything on hand makes the installation process smoother.
Materials:
- Fly screen mesh (fiberglass, aluminum, or polyester)
- Frame kits (usually include corners and frame strips)
- Spline (a rubber or plastic strip used to hold the mesh in place)
- Spline roller
- Measuring tape
- Scissors or utility knife
- Screwdriver or drill (depending on frame type)
- Optional: Velcro or magnetic strips for removable screens
Tip: Measure your windows carefully before buying materials to ensure a snug fit. Poor measurements can lead to gaps where insects can enter.
Step 1: Measure the Window
Accurate measurements are crucial. Use a measuring tape to determine the height and width of the window opening. Measure from the inside edge to inside edge of the frame if you’re installing an internal frame, or from the outer edge if it’s an external installation. Always double-check your measurements to avoid buying the wrong screen size.
Step 2: Prepare the Frame
Most fly screens come with modular frame kits. Cut the frame pieces to match your window dimensions. Frames typically consist of four sections: two vertical and two horizontal. Most kits come with corner connectors that lock the frame pieces together.
- Assemble the frame: Slide each frame piece into the corner connectors. Make sure the corners are tight and square.
- Optional sanding: If the frame is aluminum, check for rough edges and smooth them with fine sandpaper to prevent injuries.
Step 3: Cut the Mesh
Lay the fly screen mesh on a clean, flat surface. Cut the mesh so it extends slightly beyond the frame on all sides, about 2–3 cm (0.8–1.2 inches) extra. This extra material ensures it can be stretched and fixed securely in the frame.
Tip: Fiberglass mesh is easier to cut with scissors, while metal mesh may require tin snips. Always wear gloves when handling metal mesh to avoid cuts.
Step 4: Attach the Mesh
Place the mesh over the assembled frame. Starting at one side, press the spline over the mesh into the frame groove using a spline roller. Work your way around the frame, keeping the mesh taut but not overly stretched. Too much tension can cause the mesh to warp or tear.
- Check alignment: Ensure the mesh is evenly distributed across the frame, without wrinkles or sagging.
- Trim excess: Once the spline is in place, trim the extra mesh with a utility knife or scissors. Cut close to the spline for a clean finish.
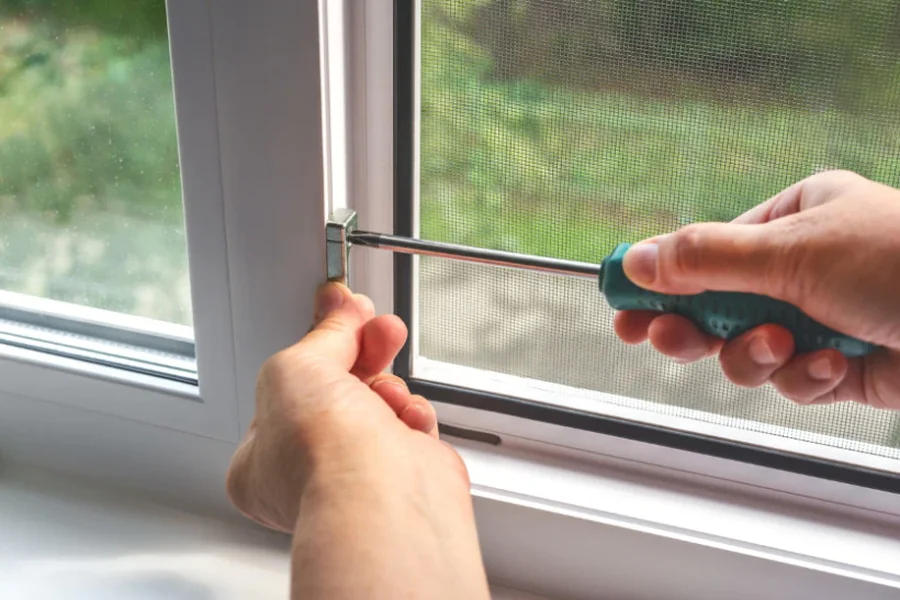
Step 5: Install the Screen
The method of installation depends on the type of window and screen:
- Sliding windows: Fit the screen into the window track. Some screens are designed to slide easily in and out for cleaning.
- Hinged windows: Attach the screen frame to the window using screws or clips provided in the kit. Ensure it opens and closes smoothly.
- Removable screens: Velcro or magnetic strips allow screens to be removed for cleaning or seasonal storage. Simply attach the strips to the window frame and press the screen in place.
Tip: Test the screen before securing it completely to make sure it fits snugly and functions properly.
Step 6: Check for Gaps
After installation, inspect all sides of the screen for gaps. Even small openings can let insects in. If you notice any, adjust the spline or frame. For permanent installations, weatherstripping can help seal minor gaps and improve insulation.
Maintenance and Care
Proper maintenance extends the life of your fly screens. Regularly clean the mesh using a soft brush or vacuum to remove dust and debris. For stubborn dirt, wash the screen with mild soapy water and rinse with clean water. Avoid harsh chemicals or abrasive cleaning tools, as these can damage the mesh.
Check the spline and frame periodically. If the mesh becomes loose, re-stretch it and press it back into the groove. Replace damaged mesh promptly to maintain effectiveness.
Benefits of Professional Installation
While installing fly screens is a manageable DIY task, some situations may warrant professional help. Custom-shaped windows, very large panes, or unusual materials can make installation tricky. Professionals can ensure a precise fit and provide long-lasting solutions, especially if you want retractable screens or specialized designs.
Conclusion
Installing fly screens is a practical way to enjoy fresh air without inviting insects indoors. With careful measurements, the right tools, and patience, you can install your screens quickly and efficiently. Not only do they protect against pests, but they also enhance comfort, safety, and ventilation. Whether you opt for a simple DIY approach or professional installation, well-fitted fly screens are an investment in a cleaner, more enjoyable home environment.